Garden Markers

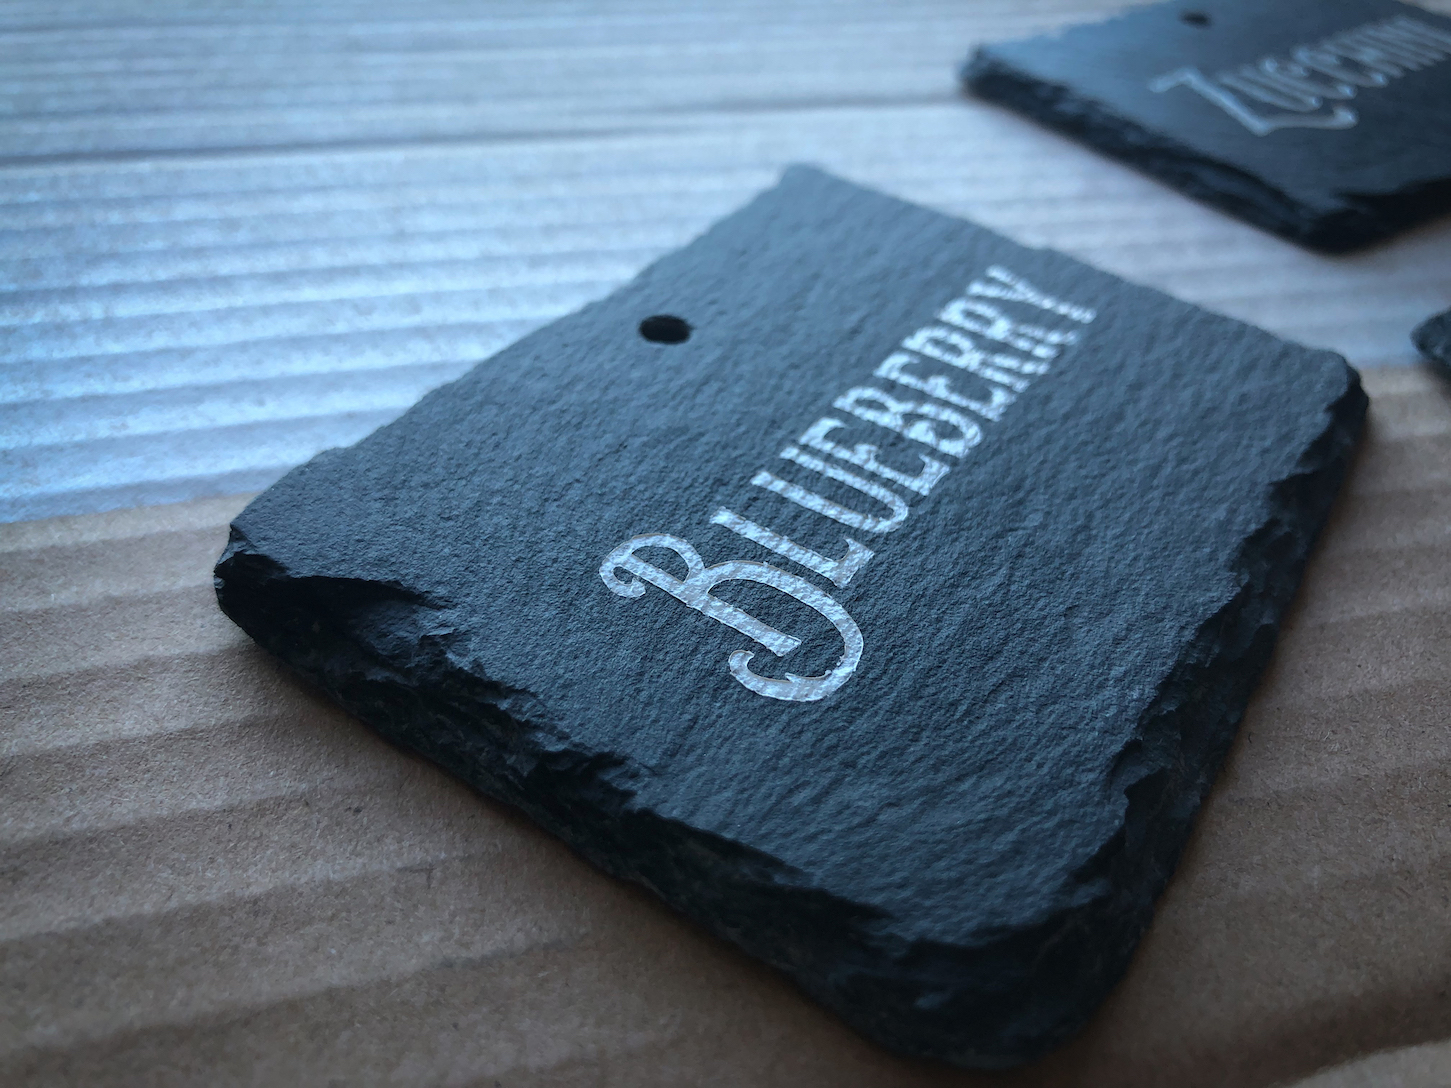
I love my garden markers.

They took some time, and I realized I needed way more than I originally planned, so I have been buying them over time.

To make them, I cut the names out using my silhouette. I weeded the positive and left the negative. I then put them on the slate tags and taped the edges, and taped them down with painters tape to a flattened cardboard box. I used spray paint and very LIGHTLY and evenly sprayed them. If there is too much paint, it will bleed under the stencil.

They turned out wonderfully!!!

This is a good example of the bleed under the vinyl.

Strawberries

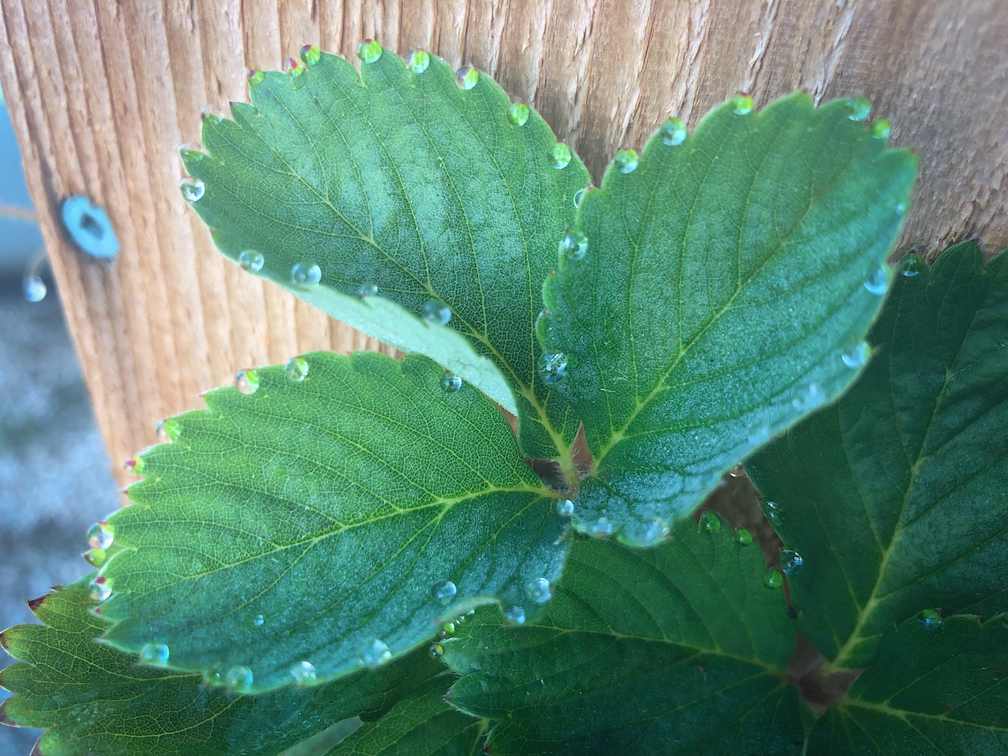
I have always wanted to be able to walk into my yard and pick strawberries whenever I wanted. I am not sure how many strawberry roots I have bought and planted and only gotten a small numbers of berries from…too many to count. I decided this would be the year I was going to concentrate on establishing the roots of some strawberry plants in order to have a bumper crop next year!

After looking at several different plans, I decided to build a tower out of some cedar fence slats I had in the garage. It was pretty simple. I drilled holes in two sides and then put it together with a finishing nail gun and wood glue.

I did put a soaker hose down the middle but it ended up rotting (it was kind of old) and so I pulled the whole thing out. I have read that people recommend a hose or pvc with holes drilled in it to allow water to get to the center. With a tower this small, it is really not necessary.

Starting a Garden

Growing up, the only “gardening” I remember doing was raking the pine needles. I do remember my mom having a pot of cherry tomatoes on our patio when I was in elementary school, but that was the extent of our garden. Sometime after I started doing the adulting thing, I decided I wanted a garden. My memory is fuzzy on exactly when I started buying seed packets to put in the ground, but I know for sure I did it when the girls were little.

It has only been recently that I have taken a serious interest in planting a garden that we can actually harvest food from and eat on a regular basis. (No, we are not there yet, but I am trying!) I started with multiple raised beds around the house after we moved in. Two years later, I ripped all of the wood out, leveled the ground the best I could and started over. After spending a few years pinning ideas, I was ready to start building new raised beds.

Why raised beds? We had our soil tested when we built our house and it is all clay. When it rains, it turns into a black, sticky mess and when it is dry, there are cracks the size of your foot that go scary deep! The consensus on raised beds seems to be that they are just overall easier to take care of.

Wood frames I was lucky that at work, we were getting rid of some old wood so I brought it home. It might or might not be treated wood…but it is pretty old so if it is treated, I’m hoping any chemicals have leached out of it already. Hubby and I were at the orange box store one evening and they had a whole pallet of pine wood that was all moldy. I asked the guy if there was a discount for it. He told me yes, and we got several 2x8x16 for a couple bucks! SCORE!

I had no real plan for building the boxes. I would just randomly go out and put some together. The ground was NOT level at all. I was not about to “dig out” and make it level, so instead I leveled it as I went along. I framed a 2×4 box of the size bed I wanted.

I hammered in stakes on the inside corners. Using a level, I would raise the box up until it leveled out, then screwed it into the corner stake. I did this on all four sides. To keep the stakes from sinking in further, and keep the 2×4 base level, I filled in bottom with pieces of pallet wood.

If I were smart, I would have built the center beds AND then filled them before building the outer beds. I did not think about the amount of dirt I would have to bring in to fill the beds. yikes! (The chickens enjoyed the different stuff I brought to fill the beds…like mulch, garden soil, compost…)

Once the frames were complete and some of the beds were filled, I put a fence around the whole thing. Mainly to keep any animals out, including the dogs and chickens.

We also added some cattle panels along some of the beds. You can see how we designed the beds around the septic tank in the ground with the walkway centering the big green caps so we still have access to pump the tank.

Next up…an irrigation system…coming soon…